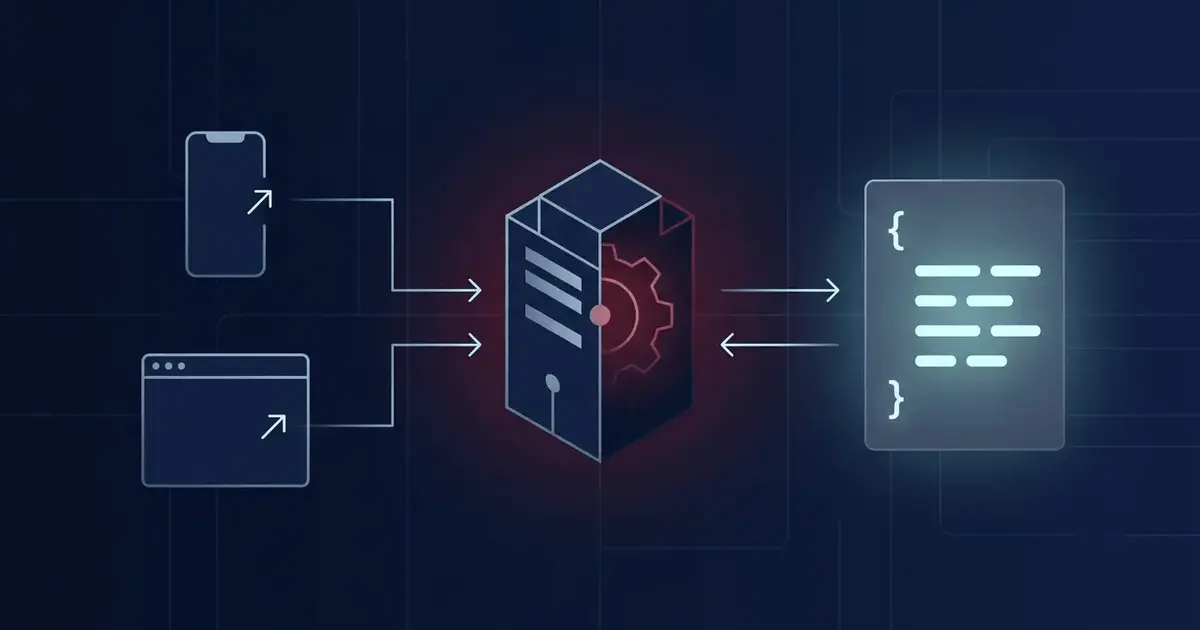
A JSON API is a backend service that communicates using JSON instead of rendering HTML pages. Instead of returning a full web page, it returns structured data that any client can consume: a mobile app, a React or Vue frontend, another server, or a command-line tool.
APIs are the backbone of modern software. Mobile apps need a backend that serves data quickly and predictably. Single page applications (SPAs) need an API to fetch and update data without reloading the page. Third party integrations, like connecting your app to Stripe or Slack, rely on well designed APIs to exchange information reliably.
Rails is exceptionally well suited for this kind of work. It gives you routing, database access through Active Record, validations, background jobs, and a mature ecosystem, without forcing you to reinvent the wheel every time you start a new project.
In this article, you will build a complete blog API from the ground up: models for articles, categories, and comments, RESTful endpoints with full CRUD support, token based authentication, pagination and search, API versioning, consistent error handling, and tests. This is a Rails API tutorial meant to take you from a blank terminal to a production-ready Rails REST API.
What Is a Rails JSON API?
A JSON API, in the Rails context, is simply a Rails application configured to respond with JSON instead of HTML. Under the hood, it is still the same Rails you already know: the same routing system, the same Active Record models, the same controllers. The difference is in what gets returned to the client.
When you build a traditional Rails application, your controllers typically render views, HTML templates filled in with data from your models. A browser requests a page, Rails renders an ERB or Haml template, and the browser displays it.
A Rails JSON API skips the HTML rendering step. Your controllers respond with render json: some_data, and Rails serializes that data into a JSON string. There is no view layer in the traditional sense, no layouts, no asset pipeline tied to server-rendered pages.
Rails supports API development well because it ships with an --api flag that strips out everything you do not need for this kind of application, while keeping what you do need: routing, controllers, Active Record, and middleware for parameter parsing and JSON rendering.
The core difference between a traditional Rails application and an API-only application comes down to responsibility. A traditional Rails app owns the entire experience, from database to browser. An API-only Rails app owns the data and business logic, and hands off the user interface to a separate client, whether that is a mobile app, a JavaScript frontend, or another service entirely.
API-Only Mode vs Full Rails Application
Rails gives you two ways to build applications, and choosing the right one depends on what you are actually trying to build.
Full-stack Rails applications render HTML views using the built in view layer. They include the asset pipeline, sessions and cookies configured for browser based authentication, and helpers for generating HTML, like form_with and link_to. This is the classic Rails setup, and it remains an excellent choice for a monolithic web application where Rails controls both the backend and the frontend.
API-only applications strip away the view layer, asset pipeline, and browser-specific middleware. What remains is a leaner, faster stack focused entirely on request handling, business logic, and data serialization. This is the right choice when your frontend lives somewhere else, such as a React SPA or a mobile app, or when you are building a service other applications will consume.
Here is a simple way to decide which approach fits your project:
If Rails renders the actual pages your users see in a browser, use a full-stack application.
If a separate client (mobile app, SPA, or third party service) consumes your data over HTTP, use API-only mode.
If you might need both (a public API and a server-rendered admin panel), you can start API-only and add view rendering later, though many teams keep the two concerns in separate applications.
To generate an API-only Rails application, run:
rails new blog_api --api --database=postgresql
The --api flag configures the following automatically:
Skips generating view files for your controllers.
Configures ApplicationController to inherit from ActionController::API instead of ActionController::Base.
Removes middleware related to browser sessions and cookies (though you can add these back if needed).
Skips the asset pipeline and helpers meant for HTML rendering.
You end up with a lighter, faster application tuned specifically for serving JSON.
Building the Project
Let's build a real project: a blog API with articles, categories, and comments. This will be the foundation for everything else in this article.
Creating the Project
Start by generating a new API-only Rails 8 application:
rails new blog_api --api --database=postgresql
cd blog_api
Database Setup
Update your config/database.yml if needed, then create your development and test databases:
bin/rails db:create
Models and Migrations
We need three core models: Article, Category, and Comment. An article belongs to a category, and an article has many comments.
Generate the Category model:
bin/rails generate model Category name:string slug:string
Generate the Article model:
bin/rails generate model Article title:string body:text published:boolean category:references
Generate the Comment model:
bin/rails generate model Comment body:text author_name:string article:references
Notice that category:references and article:references automatically create the foreign key columns and set up the belongs_to associations in the generated model files.
Now run your migrations:
bin/rails db:migrate
Open up the generated models and add the associations and validations:
# app/models/category.rb class Category < ApplicationRecord has_many :articles, dependent: :nullify
resources :articles, only: [:index, :show, :create, :update, :destroy] do resources :comments, only: [:index, :create, :destroy], shallow: true end end
The shallow: true option keeps deeply nested routes clean. Instead of needing /articles/1/comments/5 to delete a comment, you get the simpler /comments/5, while index and create still nest under the parent article, which makes sense because you usually want to know which article you are commenting on.
With models, migrations, and routes in place, you have a solid foundation to build real endpoints on top of.
Designing RESTful Endpoints
Before writing controller code, it helps to think about REST principles. REST (Representational State Transfer) is an architectural style where each URL represents a resource, and HTTP methods describe the action you want to take on that resource.
Here is how the HTTP methods map to actions for our blog API:
HTTP Method
Endpoint
Purpose
Expected Response
GET
/articles
List all articles
200 OK with an array of articles
GET
/articles/:id
Show a single article
200 OK with the article, or 404 if not found
POST
/articles
Create a new article
201 Created with the new article
PATCH
/articles/:id
Partially update an article
200 OK with the updated article
PUT
/articles/:id
Replace an article
200 OK with the updated article
DELETE
/articles/:id
Delete an article
204 No Content
GET
/articles/:article_id/comments
List comments for an article
200 OK with an array of comments
POST
/articles/:article_id/comments
Add a comment to an article
201 Created with the new comment
DELETE
/comments/:id
Delete a comment
204 No Content
PATCH is meant for partial updates, sending only the fields you want to change. PUT technically implies replacing the entire resource. In practice, most Rails APIs treat them the same way, since Strong Parameters only pull out the fields you explicitly permit either way.
This structure reflects how Rails routing organizes URLs into resources. For a deeper look at how nesting, shallow routes, and resource naming work under the hood, see our guide on how Rails routing works, which pairs well with the endpoint design here.
Creating API Controllers
Now let's build out the ArticlesController with full CRUD support, using Rails 8 conventions.
def index @articles = Article.includes(:category).order(created_at: :desc) render json: @articles end
def show render json: @article end
def create @article = Article.new(article_params)
if @article.save render json: @article, status: :created else render json: { errors: @article.errors.full_messages }, status: :unprocessable_entity end end
def update if @article.update(article_params) render json: @article else render json: { errors: @article.errors.full_messages }, status: :unprocessable_entity end end
def destroy @article.destroy head :no_content end
private
def set_article @article = Article.find(params[:id]) end
def article_params params.require(:article).permit(:title, :body, :published, :category_id) end end
Let's walk through what each action does:
index loads all articles, eager loading their category to avoid N+1 queries.
show relies on the before_action callback to find the article, then renders it.
create builds a new article from permitted parameters, responding with 201 on success or 422 with validation errors on failure.
update follows the same pattern as create, but calls update on an existing record.
destroy deletes the article and responds with 204, meaning the request succeeded but there is no content to return.
This structure, find the record, attempt the action, respond based on success or failure, is the backbone of nearly every Rails API controller you will write.
Returning JSON Responses
The render json: method is doing a lot of work behind the scenes. When you call render json: @article, Rails calls .to_json on the object (or uses a serializer if one is configured) and sets the response content type to application/json automatically.
You can pair render json: with an explicit status using the status: option, either as a symbol (:ok, :created, :not_found) or a numeric status code (200, 201, 404).
Here is what a successful response looks like:
{
  "id": 1,
  "title": "Getting Started with Rails 8",
  "body": "Rails 8 introduces several new defaults...",
  "published": true,
  "category_id": 2,
  "created_at": "2026-01-15T10:30:00.000Z",
  "updated_at": "2026-01-15T10:30:00.000Z"
}
And here is a failed validation response:
{
  "errors": [
    "Title can't be blank",
    "Body can't be blank"
  ]
}
Being explicit and consistent with your status codes matters more than people expect. A client should be able to tell what happened just by looking at the status code, before it even parses the response body. A 200 means everything worked. A 201 means something was created. A 422 means the client sent invalid data. A 404 means the resource does not exist. A 401 means the client is not authenticated. Getting into this habit early saves everyone using your API a lot of confusion later.
Serializing Data
"Serialization" just means converting your Ruby objects into JSON. Rails gives you a few different ways to do this, each with different trade-offs.
render json is the simplest approach and works well for small to medium applications. It calls as_json under the hood, which by default includes every database column. This is convenient, but it can accidentally leak columns you did not mean to expose.
as_json gives you more control without leaving the model or controller. You can override it to shape exactly what gets returned:
This keeps your serialization logic close to the model, but it can get messy once you need different shapes of the same data in different contexts (a list view versus a detail view, for example).
Jbuilder is the most flexible option and is included by default in most Rails applications. It lets you build JSON responses using a view-like DSL, especially useful when you need to include associations or compute custom fields:
# app/views/articles/show.json.jbuilder
json.id @article.id
json.title @article.title
json.body @article.body
json.published @article.published
json.category do
  json.id @article.category.id
  json.name @article.category.name
end
json.comments_count @article.comments.size
Jbuilder shines when your JSON structure needs to differ meaningfully from your database schema, or when you are nesting related data in a specific shape for a frontend team.
ActiveModel::Serializers is a separate gem that introduces dedicated serializer classes, similar in spirit to Jbuilder but structured as plain Ruby objects. It is worth knowing about if your team already uses it, though for most new projects, Jbuilder or a well organized as_json does the job without another dependency.
For our blog API, Jbuilder is a strong default: it keeps serialization logic out of controllers and models, and it scales well as response shapes get more complex.
Strong Parameters
Strong Parameters is one of the most important security features in Rails, and it applies just as much to APIs as it does to traditional applications. Without it, a client could send any field in a request body, and if you naively pass that straight into Article.new(params[:article]), they could set fields you never intended to expose, like an admin flag.
Strong Parameters forces you to explicitly whitelist which fields can be mass-assigned. Here is the pattern you already saw in the controller above:
def article_params
  params.require(:article).permit(:title, :body, :published, :category_id)
end
require(:article) ensures the request includes a top-level article key, returning a 400 status if it is missing. permit lists exactly which fields are allowed through. Anything not on that list is silently stripped out.
For nested associations, you can permit arrays or nested hashes:
def article_params
  params.require(:article).permit(:title, :body, :published, :category_id, tag_ids: [])
end
This pattern is your first line of defense against clients sending unexpected or malicious data, and every create and update action in your API should use it.
Authentication
Most real APIs need to know who is making a request. There are a few common approaches, each suited to different situations.
Token authentication is the simplest and most common approach for APIs consumed by mobile apps or first-party clients. The client sends a token with every request, typically in the Authorization header, and the server verifies it before processing the request.
JWT (JSON Web Tokens), at a high level, is a self-contained token format that encodes claims (like a user ID) directly into the token, signed with a secret key. The server can verify a JWT without a database lookup, which makes it popular for stateless APIs and systems where multiple services verify the same token independently.
API keys are typically used when a third party service, rather than an individual user, needs access to your API. They are often longer-lived than user tokens and tied to an application or integration rather than a person.
Let's implement a simple token authentication example for our blog API. First, add a api_token column to your users table (assuming you have a User model already):
render json: { error: "Unauthorized" }, status: :unauthorized unless @current_user end end
With this in place, a client sends an Authorization header formatted like Bearer <token> with every request. If the token does not match a user, the request is rejected with a 401 before it reaches your controller action.
For endpoints that should be publicly accessible, like listing published articles, you can skip the callback selectively:
class ArticlesController < ApplicationController
  skip_before_action :authenticate_request, only: [:index, :show]
  # ...
end
This gives you fine-grained control over which parts of your API require authentication.
Error Handling
A production-ready API needs consistent, predictable error handling. Clients should never have to guess what went wrong, and responses should always follow the same shape. There are four common categories of errors to handle:
Validation errors happen when a client submits data that fails your model's validations. These should return a 422 status:
Missing records happen when a client requests a resource that does not exist. Rails raises ActiveRecord::RecordNotFound when find cannot locate a record. You can rescue this globally in ApplicationController:
class ApplicationController < ActionController::API
  rescue_from ActiveRecord::RecordNotFound, with: :render_not_found

  private

  def render_not_found
    render json: { error: "Resource not found" }, status: :not_found
  end
end
Unauthorized requests should return a 401 status, as shown in the authentication section above, when a client is not authenticated at all, or a 403 status when a client is authenticated but not allowed to perform a specific action.
Standardized JSON error responses matter more than any single error type. Pick one shape and stick to it across your entire API. A simple, consistent pattern looks like this:
{
  "error": "Resource not found"
}
or for validation errors with multiple issues:
{
  "errors": [
    "Title can't be blank",
    "Category must exist"
  ]
}
Whichever shape you choose, document it and use it everywhere. Inconsistent error formats are one of the most common frustrations developers run into when integrating with a third party API.
API Versioning
APIs change over time. You will add fields, remove fields, and sometimes restructure entire responses. If you have external clients (a mobile app already published to the App Store, for example), you cannot simply change your API out from under them. Versioning lets you evolve your API while keeping older clients working.
The most common and straightforward approach in Rails is URL-based versioning, using a /api/v1/ prefix.
Update your routes to use namespaces:
# config/routes.rb
Rails.application.routes.draw do
  namespace :api do
    namespace :v1 do
      resources :categories, only: [:index, :show, :create, :update, :destroy]

      resources :articles, only: [:index, :show, :create, :update, :destroy] do
        resources :comments, only: [:index, :create, :destroy], shallow: true
      end
    end
  end
end
Then organize your controllers into matching namespaced directories:
# app/controllers/api/v1/articles_controller.rb
module Api
  module V1
    class ArticlesController < ApplicationController
      # same logic as before
    end
  end
end
Now your endpoints live at /api/v1/articles instead of /articles. When you need to make a breaking change down the line, like restructuring how comments are nested in an article response, you create a V2 namespace and a new set of controllers, while V1 keeps working exactly as it did before. Clients can migrate to the new version on their own schedule instead of being forced to update immediately.
Pagination
Returning every single article in one response works fine with ten records. It falls apart with ten thousand. Pagination limits how much data you send back per request, which keeps your API fast and your response payloads manageable.
Pagy is a lightweight, fast pagination gem that works well with Rails APIs. Add it to your Gemfile:
gem "pagy"
Include it in your ApplicationController:
class ApplicationController < ActionController::API
  include Pagy::Backend
end
Then use it in your controller:
def index @pagy, @articles = pagy(Article.includes(:category).order(created_at: :desc))
Clients request specific pages using a query parameter, like /api/v1/articles?page=2. The metadata you include in the response (current page, total pages, total count) lets the client build pagination controls without making extra requests just to figure out how much data exists.
Beyond keeping responses small, pagination has real performance benefits. Loading and serializing ten thousand records on every request wastes memory and CPU time on both the server and the client, even if the client only displays twenty at once. Kaminari is a solid alternative to Pagy if you prefer its API, but the underlying benefits are the same either way.
Filtering and Searching
Clients rarely want every record all the time. They want articles in a specific category, or articles matching a search term, or results sorted a particular way. Query parameters are the standard way to support this in a REST API.
Here is a controller that supports filtering by category and searching by title:
def index @articles = Article.includes(:category)
@articles = @articles.where(category_id: params[:category_id]) if params[:category_id].present? @articles = @articles.where("title ILIKE ?", "%#{params[:search]}%") if params[:search].present? @articles = @articles.order(sort_column => sort_direction)
def sort_column %w[title created_at].include?(params[:sort]) ? params[:sort] : "created_at" end
def sort_direction params[:direction] == "asc" ? :asc : :desc end
A client can now request something like /api/v1/articles?category_id=2&search=rails&sort=title&direction=asc and get exactly the slice of data they need.
A few best practices are worth calling out. Always whitelist which columns can be used for sorting, like the sort_column method above, rather than passing params[:sort] directly into order. This prevents SQL injection through the sort parameter, an easy mistake to make. Use ILIKE (or your database's equivalent) for case-insensitive searching. For anything beyond basic filtering, consider a dedicated search gem like ransack or a full text search solution, but for most blog-style APIs, straightforward where clauses get you a long way.
Testing Your API
You need confidence that your endpoints actually work the way you expect, both while building and after every change. There are a few complementary ways to test a Rails API.
curl is the fastest way to manually poke at an endpoint from the terminal:
curl -X GET http://localhost:3000/api/v1/articles \ -H "Authorization: Bearer your_token_here"
Postman and Bruno give you a graphical interface for building and saving requests, useful when testing complex flows or sharing a collection with teammates. Bruno has gained popularity as an open source, git-friendly alternative to Postman, storing request collections as plain text files instead of in a proprietary cloud format.
Request specs with RSpec are what you actually want running in CI, since they verify your API automatically on every change. Here is an example:
describe "GET /api/v1/articles" do it "returns a list of articles" do create_list(:article, 3)
get "/api/v1/articles", headers: headers
expect(response).to have_http_status(:ok) expect(JSON.parse(response.body)["articles"].size).to eq(3) end end
describe "POST /api/v1/articles" do it "creates a new article with valid params" do category = create(:category) params = { article: { title: "New Post", body: "Content", category_id: category.id } }
post "/api/v1/articles", params: params, headers: headers
expect(response).to have_http_status(:created) end
it "returns errors with invalid params" do post "/api/v1/articles", params: { article: { title: "" } }, headers: headers
expect(response).to have_http_status(:unprocessable_entity) end end end
Request specs test your API the way a real client would: making an HTTP request and asserting on the response. This makes them a great safety net as your API grows.
Security Best Practices
Security deserves deliberate attention in any API, since you are exposing your data and business logic directly to the outside world.
HTTPS should be non-negotiable in production. Without it, tokens and data travel in plain text and can be intercepted. Rails makes this easy with config.force_ssl = true in production.
Rate limiting protects your API from abuse. Gems like rack-attack let you throttle requests per IP address or per user.
Authentication and authorization are related but distinct. Authentication answers "who are you?" while authorization answers "are you allowed to do this?" Every sensitive action should check both.
Strong Parameters, covered earlier, prevents clients from mass-assigning fields they should not access.
SQL injection prevention comes largely for free when you use Active Record's query interface correctly, with parameterized queries like where("title ILIKE ?", value) instead of string interpolation.
CORS (Cross-Origin Resource Sharing) controls which domains are allowed to make requests to your API from a browser. If your frontend lives on a different domain than your API, you need to configure this using the rack-cors gem:
# config/initializers/cors.rb
Rails.application.config.middleware.insert_before 0, Rack::Cors do
  allow do
    origins "https://yourfrontend.com"
    resource "*", headers: :any, methods: [:get, :post, :put, :patch, :delete]
  end
end
Input validation at the model level, using Active Record validations, is your last line of defense against bad data reaching your database, regardless of what a client sends.
Performance Tips
A functionally correct API is not the same as a fast one. A few habits go a long way toward keeping your API responsive as your data grows.
Eager loading prevents the N+1 query problem, where loading a list of articles triggers a separate query for each article's category. Using includes(:category) instead of letting Rails lazy-load each association individually can turn dozens of queries into just two.
Pagination, covered earlier, keeps individual responses small and fast to generate and transmit.
Database indexes on foreign keys and frequently queried columns (like category_id or any column you filter or sort by) speed up lookups as your tables grow. Rails automatically indexes foreign keys created through references, but add indexes explicitly for other columns you query often.
Efficient queries matter more than people expect. Avoid loading entire records into memory just to count them (use .count instead of .all.length), and avoid loading associations you are not going to use in the response.
Caching can reduce database load for data that does not change on every request. Low-level caching with Rails.cache.fetch works well for API responses that are expensive to compute but do not need to be perfectly real-time.
Background jobs are essential for anything that takes more than a few hundred milliseconds and does not need to complete before you respond to the client, like sending a confirmation email after a comment is posted or processing an uploaded image. If you are new to this pattern, our guide on Active Job in Rails walks through moving that kind of work into the background instead of making an API client wait for it to finish.
Common Mistakes
Even experienced developers fall into these traps when building their first few APIs.
Returning too much data. Sending every column from every record bloats your responses and can leak information you did not mean to expose. Be deliberate about what you serialize.
Missing HTTP status codes. Returning 200 for everything, including errors, forces clients to parse the response body just to figure out whether something went wrong.
No authentication. Leaving write endpoints open to anyone is one of the fastest ways to end up with corrupted or malicious data. Even simple token authentication is far better than none.
Poor validation. Relying entirely on frontend validation is a mistake. It is a convenience for users, not a security boundary. Your models need their own validations regardless of what any client sends.
Inconsistent JSON structure. Changing the shape of your responses between endpoints, or between successful and failed responses, makes your API frustrating to integrate with. Pick a structure and apply it everywhere.
Ignoring API versioning. Breaking changes without a versioning strategy will break every client depending on it. Setting up the namespace structure early costs almost nothing and saves a painful migration later.
Loading unnecessary associations. Eager loading associations you never serialize just wastes memory and query time. Only load what you use.
Real-World Example
Let's walk through the complete request lifecycle for our blog API, tying together everything covered so far: authentication, CRUD operations, categories, comments, pagination, search, versioning, and error handling.
Here is what a request to create a new article looks like, from start to finish:
The request arrives at the router, which matches it against /api/v1/articles and dispatches it to Api::V1::ArticlesController#create. Before the action runs, authenticate_request checks the Authorization header against your users table. If no matching token is found, the request stops with a 401. If it succeeds, create builds a new Article from the permitted parameters, validates it, saves it, and renders the result as JSON with a 201 status.
A request to list articles with search and pagination follows a similar path through index: the controller applies category and search filters, paginates the results with Pagy, and returns both the articles and pagination metadata.
Nested resources, like adding a comment to an article, follow the same pattern but scope the query to the parent record first, using params[:article_id] to find the correct article before creating the comment underneath it.
This lifecycle, route, authenticate, validate, persist or query, respond, repeats across nearly every endpoint you build. Once you internalize it, adding new resources becomes a matter of following a well worn pattern.
Frequently Asked Questions
What is a Rails JSON API? A Rails application configured to respond to HTTP requests with JSON instead of HTML, typically consumed by mobile apps, SPAs, or other services.
Should I use API-only mode? Use it when your frontend lives in a separate application, like a mobile app or SPA. Use a full-stack Rails app when Rails renders the pages users see directly in a browser.
How do I authenticate API users? Token authentication suits first-party clients. JWT fits stateless, multi-service architectures. API keys work well for third party integrations.
Should I use Jbuilder? It is a strong default once your JSON structure needs to differ from your database schema or include nested associations in a specific shape.
What is the best serializer? There is no single best option. render json and as_json work for simple cases. Jbuilder offers more flexibility. ActiveModel::Serializers is worth considering if your team already relies on it.
How do I version my API? URL-based versioning with a /api/v1/ namespace is the most common approach, letting you introduce breaking changes without affecting existing clients.
How do I test a Rails API? Use curl, Postman, or Bruno for manual testing, and request specs with RSpec for automated coverage in CI.
How do I secure a Rails API? Enforce HTTPS, add rate limiting, require authentication and authorization, use Strong Parameters, rely on parameterized queries, configure CORS deliberately, and validate input at the model level.
Conclusion
Rails takes a lot of the tedious, error-prone parts of building a JSON API and turns them into well established, repeatable patterns. Routing maps cleanly to REST principles, Active Record handles your data layer, Strong Parameters keep your endpoints secure, and the same controller structure scales from a simple blog API to a much larger production system.
The REST principles and best practices covered in this article, consistent status codes, predictable JSON structures, proper authentication, thoughtful versioning, and deliberate performance considerations, apply regardless of how large your API eventually grows. Get these fundamentals right early, and everything you build on top of them becomes easier to maintain.
You now have everything you need to build your own production-ready Rails JSON API. Take the blog API from this article, extend it with your own resources, and start building something real.
💌 Don’t miss out! Join my newsletter for web development tips, tutorials, and insights delivered straight to your inbox.